I know the title needs work but thats what the dress is going to be. I been designing a Ball gown based off the Victorian ball gown. Its a very full skirt the type you see in the old Musical movies such as The King and I. There are some minor differences in this gown. I will be adding a steampunk feel to it by hand embroidering a steampunk spider in the center of the bodice. The edging will have a cog and gear embroidery boarder design. Which I got both designs from
Urban Threads.
The Gown itself is silver bridal satin, it just happen to be sitting in a basket for a few years waiting to be used. The gown is actually 2 pieces a bodice and a skirt. The Bodice is 4 layers. The top 2 layers are the main fabric and muslin. I use muslin as my stabilizer in everything. These are the two layers I will embroider on. The lining is in 2 layers so I can make the boning channeling. To close the bodice there will be heavy duty hooks like the ones you put on skirts and pants.

The skirt is a full bell shape, with the same hook closure as the bodice. On the bottom near the hem line will be the cog and gear embroidery design boarder. I haven't decided about a stabilizer for the skirt yet or even have a lining on it. I have time to make that decision.

I have also decided to make a petticoat skirt instead of a hoop skirt. I have a 4 tier hoop skirt and have no desire to have another one lol. The petticoat will be white linen that will have a drawstring waist. It will also have lace edge on the bottom hem. Just above the hem line will be the same cog and gear boarder pattern. I will also be using either a Tea Stain Method or Coffee Stain method to antique the fabric. I have been contemplating on adding a few layers of tulle to help give it a shape. Still have time to think about this as well.
The drawers will be a simple white linen no staining. It will have a drawstring waist. I decided to go with a flower and leaf motif for the embroidery on the pant hems. Lace will finish the hem line.

Lastly is the cloak and arm gloves. This fabric is a spiderweb lace in black. Its the stuff you see with the Halloween fabrics. The arm sleeves are a simple glove that comes to a v at the hand. They are like Opera gloves but no fingers. I will be using elastic and to keep them up on my upper arm to cover the elastic I will have silver ribbon that comes into a bow. to keep the v on the back of my hand i will be adding a simple finger loop that will slid over the middle finger. The cloak will have a simple closure of ribbon either black or silver not sure yet.
I hope you enjoyed our simple sketches and Keep your eyes on this thread for updates on the outfit.
*
Update 5-1-2011*
I finished the Cloak, I had to do
french seams to make it all nice and neat. The fabric was a slight challenge to sew but I finished it in record time. The sewing only took 5 hours to assemble.
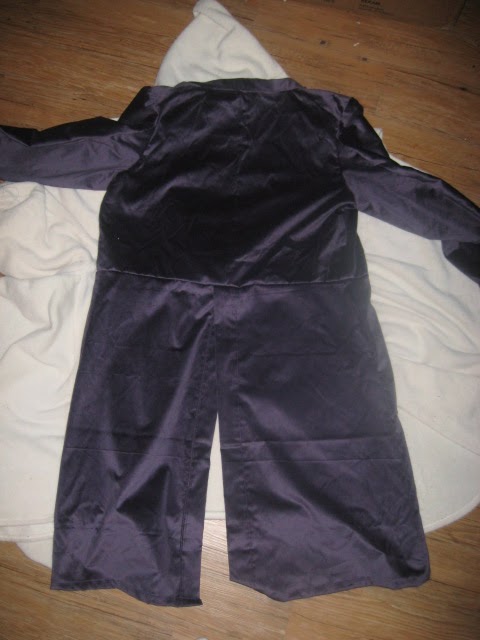
Cloak and skirt pic (Model is in her jeans and t-shirt and not wearing a corset or hoop skirt and petticoat as would have been worn for the skirt. Just a quick update pic ;) )
Ribbon Tie for the cloak simple but functional.

The Skirt was a bit more of a challenge, as I mentioned its silver bridal satin, which means "I fray a like crazy", not to worry I use this fabric a lot so I know how to handle it. I did the
french seams and double folded hems on the exposed edges. The total time of sewing the skirt together was a grand 5 hours.

The reason it took so long was some trouble spots on the waist band. The original pictures of the skirt looked like wide ribbon of some sort. Well I didn't have anymore ribbon I used the last of it on some under bust corsets. It took me a few hours to dig around my trims and I found a package of extra wide bias tape. By the price tag it had been sitting there for at least 4 years. So I used black bias tape for the waist band. The Skirt itself has deep pleats on the front and sides and on the back its gathered. I still have the heavy duty skirt hook to hand stitch on and add the two snaps along the back opening. I didn't have a detail picture on how they closed the back of the skirt so I am improvising with a modern trick.
Snaps and dress pant hooks these hooks will also be used for the back of the bodice.

Last night I spent 5 hours transferring the cog and gear embroidery pattern onto the skirt. Let me say this bridal satin does not take modern methods well. I tried on scraps the transfer pen, the light box, carbon paper, Seamstress paper and none of it worked. I looked in my big ben of stuff to figure out what to do. This is why it took so long to transfer the pattern searching for a way to get it on it. I found some old lightweight interfacing. It happen to be white so out of desperation I placed it over the printout and presto I had my pattern fabric! It took actually 3 hours to trace the pattern, its a big skirt hem! I then cut the strip close to the top of the pattern and pined it on the back side of the skirt. Once its embroidered on I will then trim the interfacing close to the stitches. At this point I have no clue on how long the embroidery part on the skirt is going to take, guess I will find out this week :)
I still have to sew together the bodice part and transfer the embroidery design onto the muslin interfacing. Thats todays goal. Have a happy Beltane everyone :)
*Update 5-2-2011*
This might be the last update for some time, I have the bodice almost finished I just need to embroider it add trim and put the lining and it together.
Bodice Lining is 2 layers with white boning casing. The casing so you can see where the bones will be placed.
Close up of the bone casings
This is the side that will be next to the body the wearer will never see the bone casings.
Back of lining
Spider design on the muslin interfacing.
Front
The actual front of the bodice that everyone will see once I do the embroidery and place the trimming on.
Back of bodice will have hook closures.
Well thats it for now, it might be a while before this post is updated again.
*6/27/2011*
Part of the steampunk spider Still have a lot to do on it.
September 1, 2011
Nothing much I am almost done with the spider work, With so many things going on I hadnt had much chance to work non stop on this project. But I am closer to finishing the top!
September 3rd 2011
I am Stuck, Which Lace should I make and use?
Paddle Wheel
Or Maltese Lace?
The lace will be in black and be around the neck collar.
Hmmmm any ideas?
September 7, 2011
This is the corset I am working on for the undergarments. It will lace in the front and back, for the simple reason I ran out of busks and didn't feel like making an order for one little item. So I decided that in the front it will have elastic lacing. Will make for a stretchy escape. Seen some LARP woman use elastic and thought gee why hadn't I ever thought of that. It will be coffee stained for antique purposes its too white and cheerful for me. But hey its undergarments like anyone will see them right?
So whats left on it? Adding the bones, Grommets, Finishing the top part bias, And then antiquing it and then the laces. The back lace will be black ribbon. I know many are sitting there and saying :Its to pretty to antique" well if I was "Girly" I would agree ;)
I have been practicing my crochet skills hopefully soon I will be good enough to start on the lace edging. I still hadn't decided which one to do. Although the Maltese is enticing the instructions is complicated. We will have to wait and see where it all goes from here.
October 7, 2011
Well I hadn't gotten very far as I like but getting there. I finished up a pair of fingerless gloves. They are made out of the same spider web lace as the cloak. Didn't take long to put together.
I used elastic on the top, so I cheated like crazy but hey Steampunk is all about infant possibilities right? I am sure Elastic is somewhere in the imaginative world ;) The casing is made with Black Velvet Ribbon, and guess what I have enough fabric and supplies to make 7 more pairs! So once I get better pics I will be making a custom listing on the website.
I am currently waiting until I have enough money to buy more Bones so I can finish up my corset thats my hold up on it. And I am still working on the skirt. So not much visual accomplishment yet.